Step-by-step Guide to Deploy Subnet
In this tutorial, you will learn to deploy subnet, interact with it, deploying smart contracts on it.
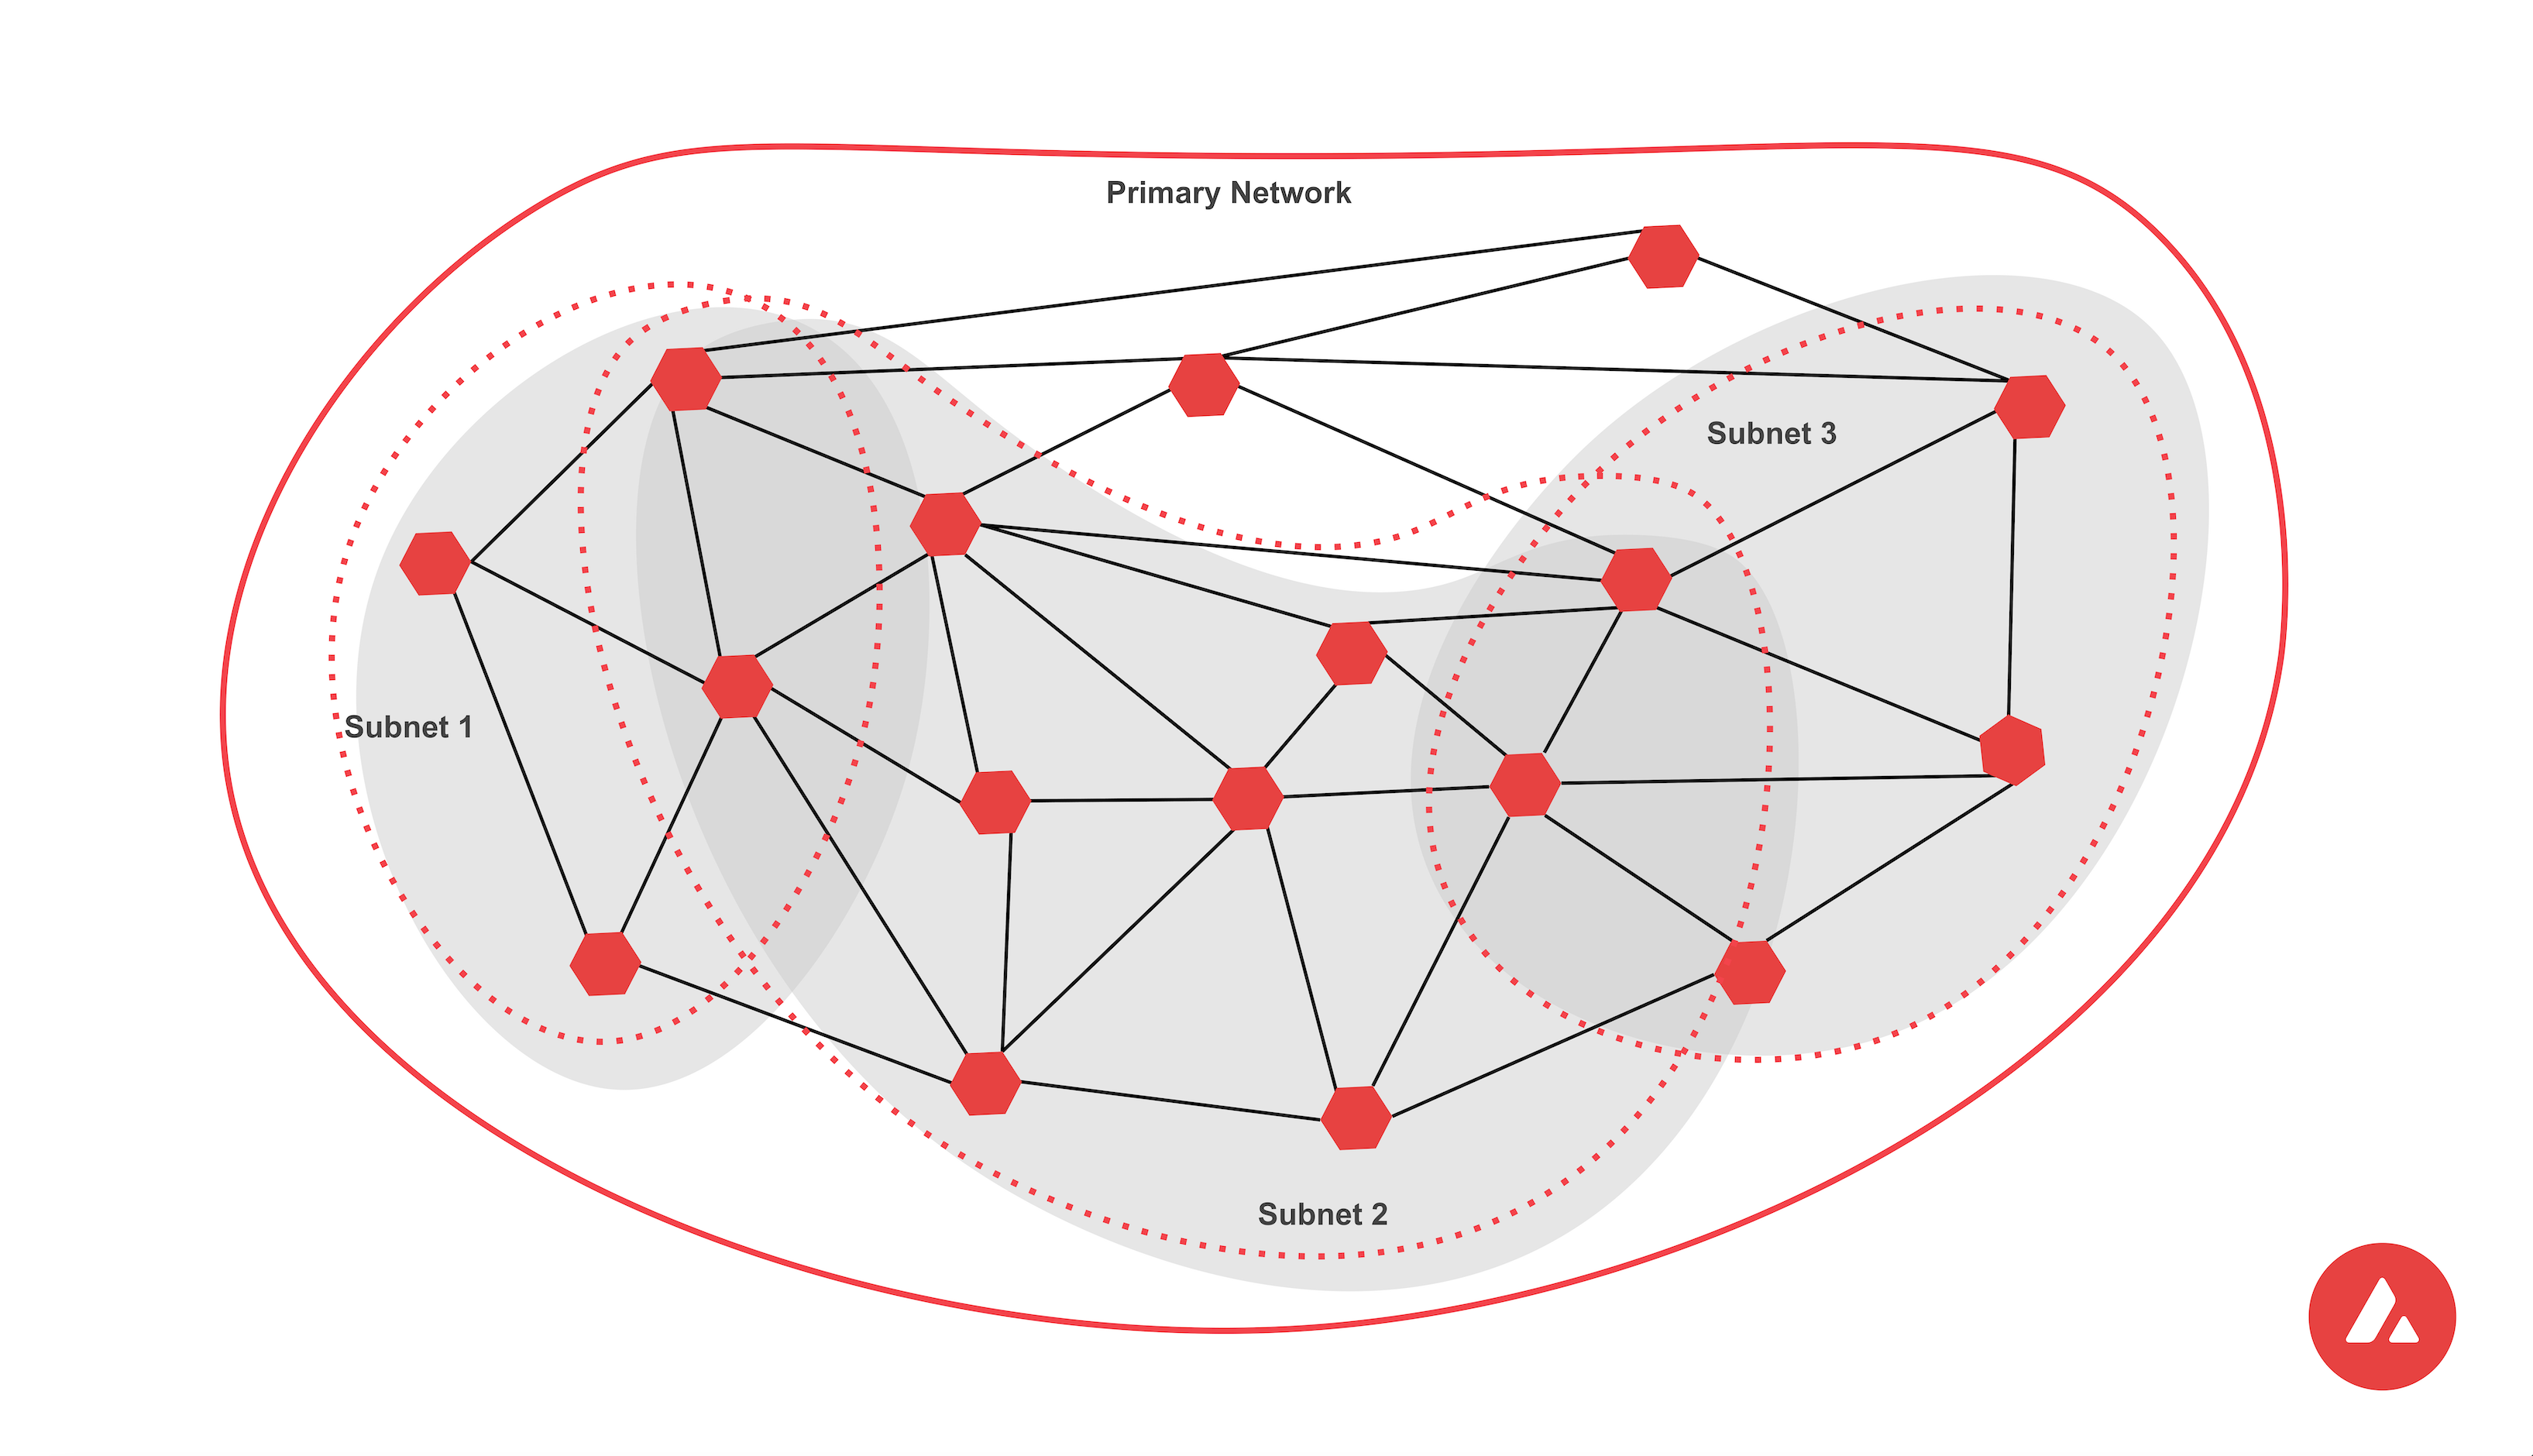
Scalability is a popular issue needed to be solved for Layer 1 (L1) blockchain projects. Decentralized networks must strike a delicate balance between decentralization, security, and scalability inside a blockchain infrastructure, a problem known as the Blockchain Trilemma. L1 projects have different approaches to delivering scalability without conceding decentralization and security. Avalanche uses subnets to achieve scalability with horizontal scaling. In this guide, I will explain how easy to build a subnet locally and create smart contracts on it.
At the end of this guide, you will be able to create a custom subnet and deploy smart contracts on it using your terminal. It takes less than 10 minutes.
What is Subnet?
Before jumping into the guide, let's define the subnet.
According to Avalanche, a subnet is a sovereign network which defines its own rules regarding its membership and token economics. It is composed of a dynamic subset of Avalanche validators working together to achieve consensus on the state of one or more blockchains.
Developers can create custom subnets on the Avalanche network that are optimized for their specific needs and requirements. These subnets can be customized in terms of hardware requirements, block sizes, transaction fees, compliance, privacy settings and other parameters. It is a powerful tool for developers who want to create highly customized and scalable blockchain applications on the Avalanche network.
How to Build a Subnet?
Getting Started
A command line interface (i.e. Terminal on macOS) is used in the guide. To build a subnet, it is needed to interact with Avalanche-CLI which is a command line tool that gives developers access to everything Avalanche.
Note: Avalanche-CLI has been tested on Linux and Mac. Windows is currently not supported.
Open your CLI program wherever you want. (For me it's
~/build-first-subnet)Install the latest Avalanche-CLI binary
curl -sSfL https://raw.githubusercontent.com/ava-labs/avalanche-cli/main/scripts/install.sh | sh -s
- Add the command to your system path by running. It makes it possible to call the Avalanche-CLI program anywhere with just
avalanche
export PATH=~/bin:$PATH
Subnet Configurations
In this tutorial, Subnet-EVM which is Avalanche's Subnet fork of the EVM will be used. However, it is possible to create custom VMs based on requirements and specifications.
Select a name for your Subnet (I select
devrelUni)Run
avalanche subnet create devrelUni
⚠️ Modify the command based on your subnet name.Choose your VM. (
Subnet-EVM)

Enter ChainID. (I select
21092020)
⚠️ For mainnet developments, it should be unique and not shared with any other chain.Enter Token Symbol. (I select
DUNI)
It will be native token of your subnet.Select
Use latest versionfor Subnet-EVM version.Choose gas fee configurations. (I select
C-Chain's setting)
⚠️ It is possible to select low-mid-high throughput or custom fee config.

Choose airdrop settings (I select
Airdrop 1 million tokens to the default address (do not use in production))
⚠️ Default address' private key is publicly shared and known since it's only used for testing purposes. DO NOT SEND ANY REAL FUNDS TO THIS ADDRESS.Select
Nofor precompiles setting.
It is an advanced feature, so it should be selected asNofor the scope of this guide.

Subnet configuration is ready. Time to deploy!
Subnet Deployment
To deploy subnet, run
avalanche subnet deploy devrelUnicommand.
⚠️ Modify the command based on your subnet name.Choose
Local Network.
Subnet is deployed locally! The output should be similar to this one.
RPC URL is used to connect the blockchain.Funded address is the default address whose private key is publicly known.Network name is the name of the subnet.Chain ID is the ID of the subnet.Currency Symbol is the symbol of native token of the subnet.

How to Interact with Subnet?
In this tutorial, Core Wallet (Avalanche's Web Extention Wallet) is used. Using Metamask is also fine.
Adding Subnet to Wallet
Import the default wallet by using private key.
Click
See all networksand+to add custom network.Complete informations based on your subnet.

After selecting your subnet, you can check the native token amount which was airdropped while deploying subnet.

How to Deploy Smart Contracts on Subnet?
Getting Started
Our subnet VM is Subnet-EVM, so it is possible to deploy Solidity smart contracts. All developer tools such as Remix, Hardhat, Foundry can be used. In this tutorial, Hardhat will be used.
Run
npx hardhatand select options based on your choice.Run
npm i dotenv --saveto installdotenvpackage.Open your code editor (like VS Code) in your directory.
Create
.envfile to include yourRPC_APIandPRIVATE_KEYinformation.Modify
hardhat.config.jsfile to import your subnet in it.
⚠️ I givedevrelname for my subnet in config file. You can choose whatever you want.
Create your smart contracts. I'll use
Lock.sol, example smart contract of Hardhat.Modify
scripts/deploy.jsscript file. It will be used to deploy smart contracts to subnet.Run
npx hardhat compileandnpx hardhat run scripts/deploy.js --network devrel
⚠️ Modify the command based on your subnet name.Congratulations! You deployed your smart contracts to your subnet.
You can check the balance after deploying. It should be decreased due to gas fee.

This tutorial mainly focuses on showing creating and interacting with a subnet easily. It is possible to deep into subnet creation on Avalanche Docs. If you liked this content, you can follow me on Twitter and Lens.


